NMU styles academic programs in a specific way. Here are instructions on how to create that look when designing your program.
A Program is divided into Cores, those cores in the Catalog are the different sections.
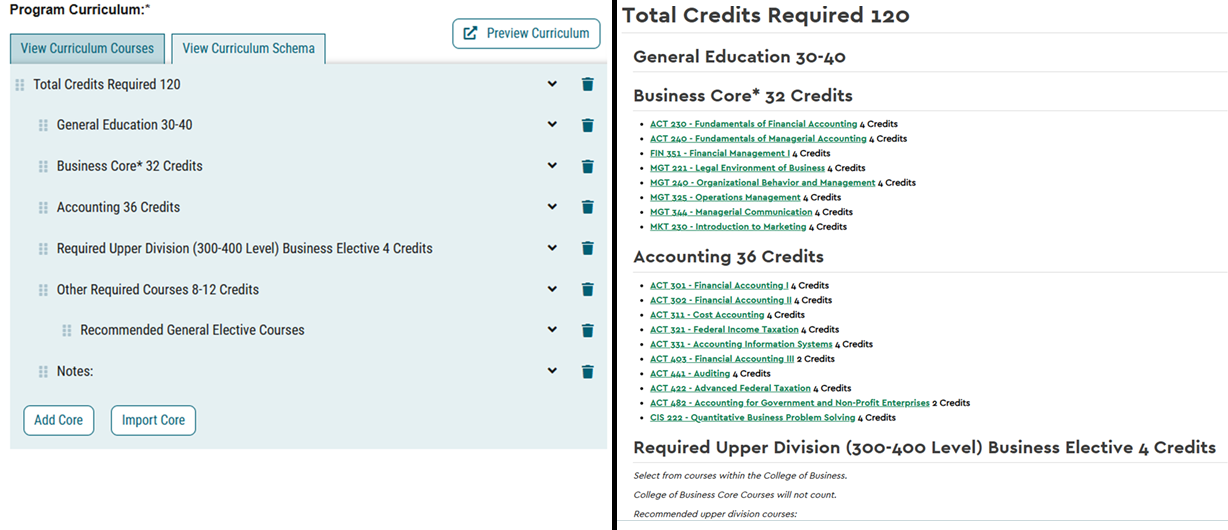
Here is a sample Curriculum Schema and the related page in the Catalog. You can see how the cores match the different sections in the catalog.
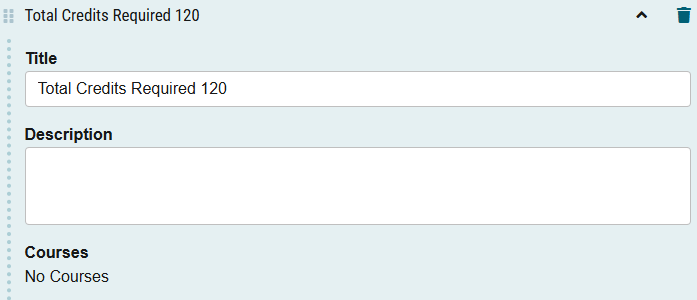
The first core every program should have is the “Total Credits Required”
- Click “Add Core”
Under title add “Total Credits Required ###” ### being the number of credits for your program. Reminder that if your program is under 120, your total credit number is 120.
The second core baccalaureate and associate degree programs should have is “General Education ## - ## “
- Click “Add Core”
- Under title add “General Education ##”
- For Baccalaureate majors it should be “General Education 30-40”
- Associate Degrees will vary by type
The next cores will list the program requirements or notes. Most cores will have you add the courses you added into the “Curriculum Courses” list.
Here is an example from the “Business Core”
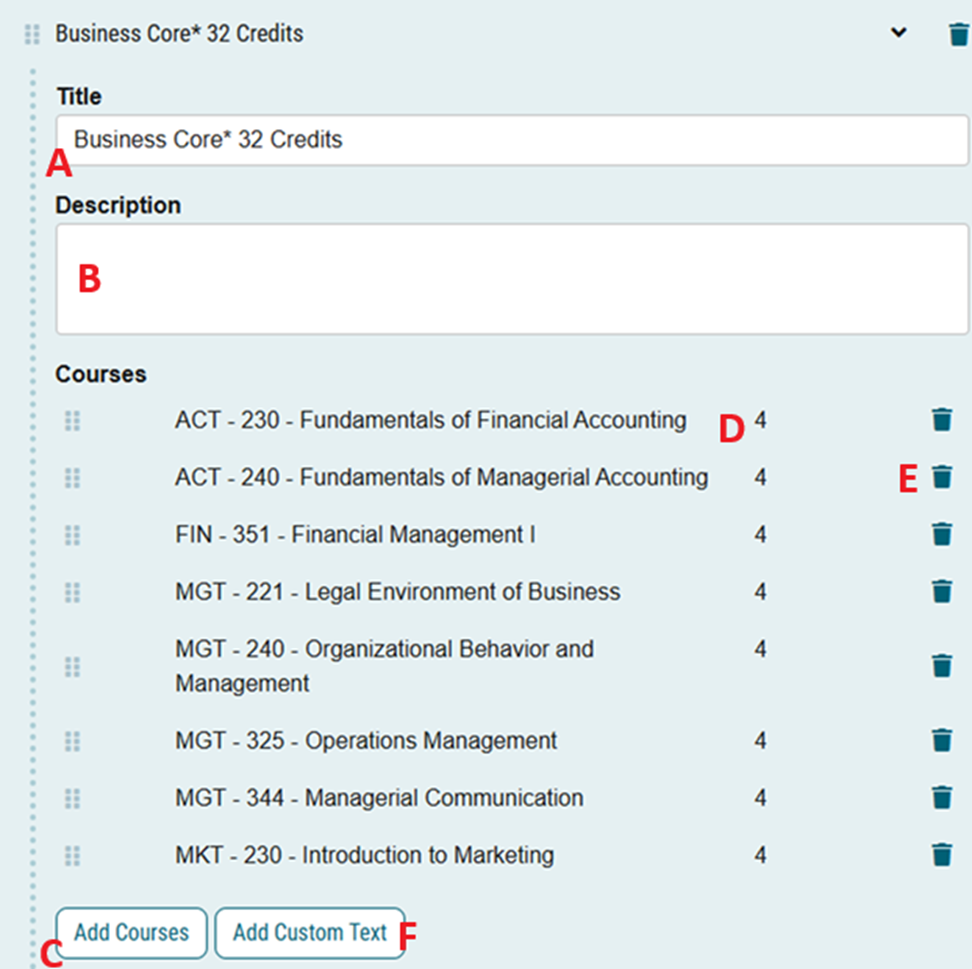
A. The Title of the Block
B. Description includes any public facing notes about the block. Examples include: “Choose 16 credits from the following”, “Choose 4 credits of 300 level courses" or "Select from three different subject codes"
C. Click Add Courses to choose classes from your list of “Curriculum Courses” A new window will open, allowing you to choose from your list, and add them to that specific block
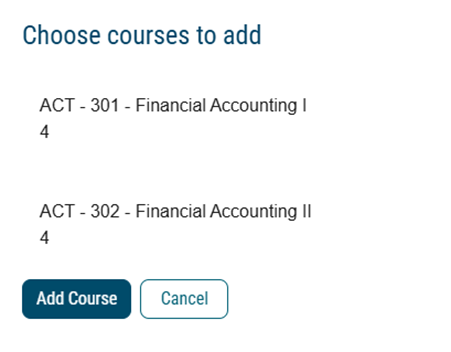
D. Will show the number of credits for the class. This is determined by the approved course.
E. The trashcan will remove a course requirement from the schema.
F. “Add Custom Text” this will allow you to customize how your blocks look. By default adding multiple courses to a block will create a list. However, if you would like custom spacing, “or” options, or non-required courses, you will need to Add Custom Text”
Here is the custom text screen:
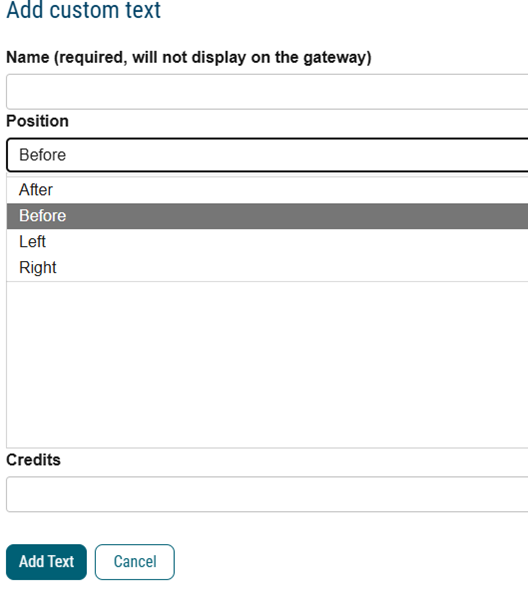
- Name (required, will not display on the gateway): This is a space for you to name what you are creating. This information will not display
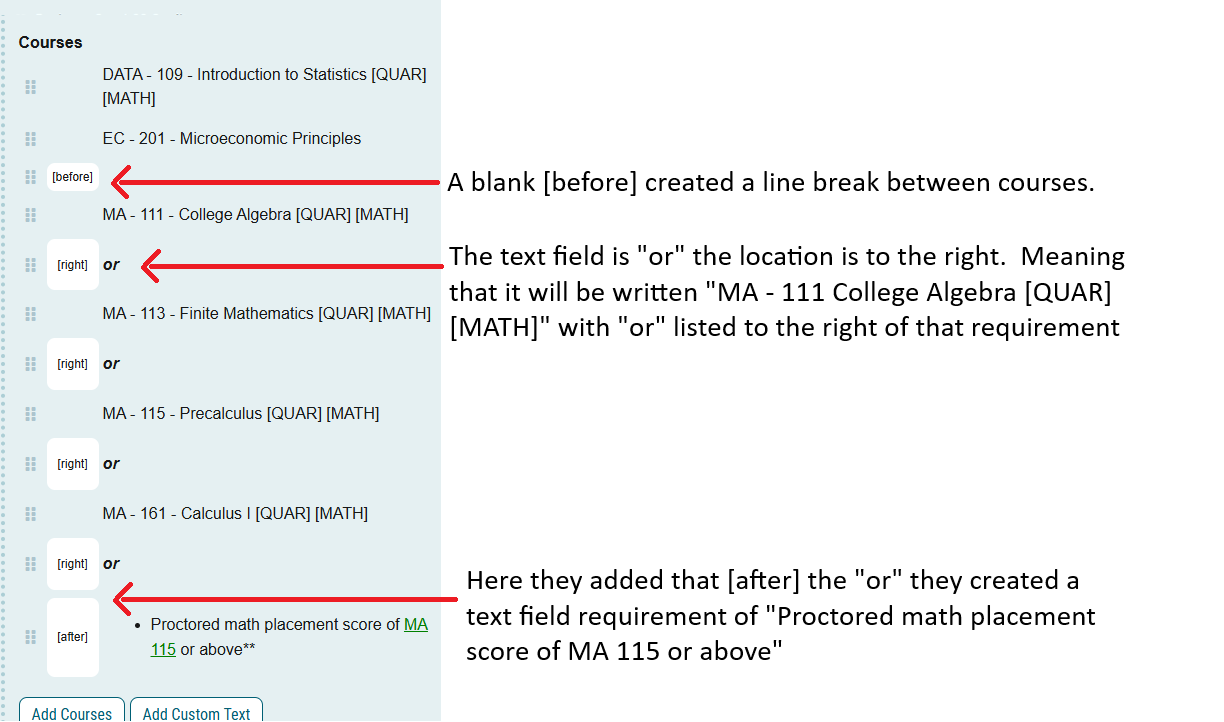
- Position: You can choose “after” “before” “left” “right”
- After: the text will appear
- Before: the text will appear before the item this
- Left: the text will appear in the same line, to the left
- Right: the text will appear in the same line, to the right
- Text field: Here is where you would enter the information for the catalog to display. For example, you would put “or” here.
- Credits: This would be if you added a non-class category that required credits. This is uncommon.
For example, to achieve this look:
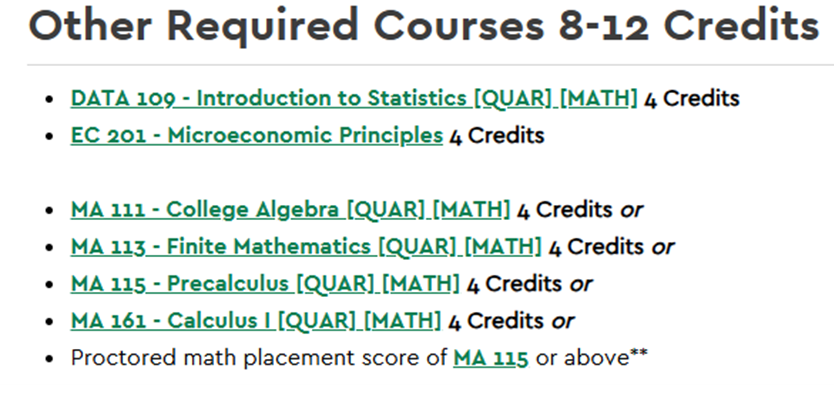
This was the formatting that was used to create the listing above: